
If you’ve been reading this blog for a while, you know I’m an absolute sucker for snorkeling. Heck- I even left my friends on the beach in Belize (a few times) to head out to the reefs for some solo snorkeling fun (with others – I never recommend going at it alone).
I’ve been lucky to snorkel in some of the best waters on the planet (Greek Islands, Belize, Maui + Kauai, French Polynesia // Bora Bora, Mexico, Southern California, Caribbean, etc), and have learned a thing or two when it comes to photographing all those lovely creatures I encounter. The clarity of the water will have a drastic impact on your photos, but follow these quick underwater photography tips and I guarantee you’ll start taking better photos!
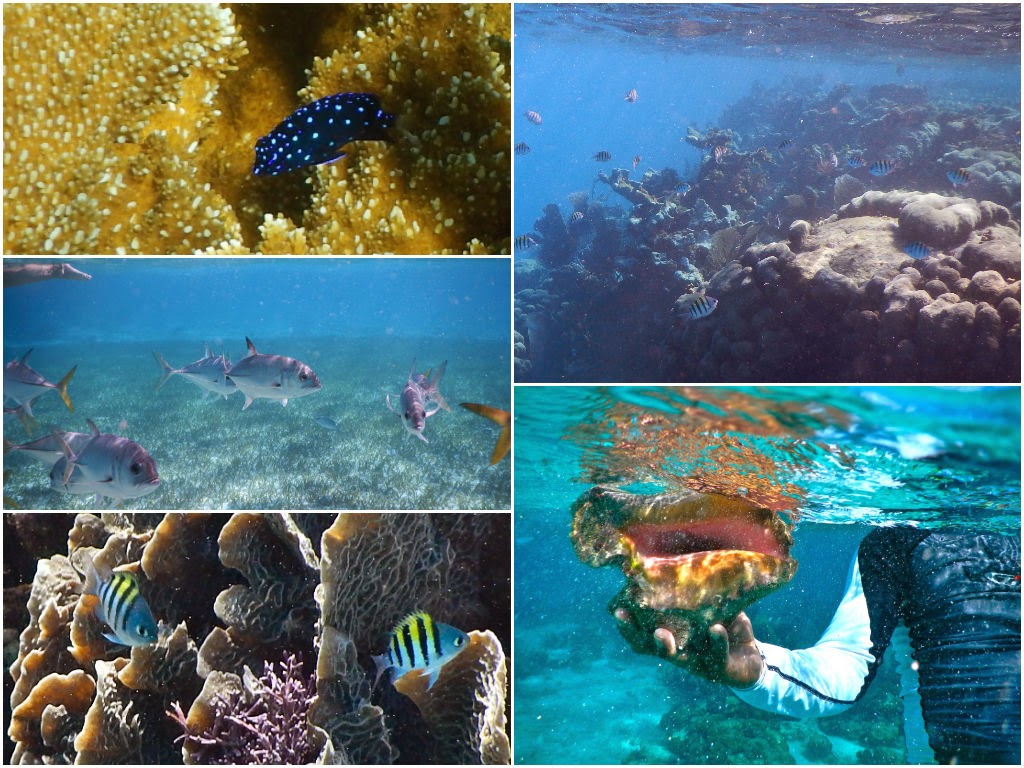
NOTE: All of these photos are straight from the camera, without any editing done. I wanted to show you exactly how they appear taken underwater before any post processing occurs. I use Adobe Lightroom in case you’re curious. 🙂
5 Underwater Photography Tips to Improve Your Photos When Snorkeling
Underwater Photography Tips #1. Have the right equipment
This goes without saying, but you’ll obviously need a (completely) waterproof camera in order to use it under water. When buying an underwater camera, check on the depth (usually measured in meters). If you’re just planning on using it for snorkeling, a depth of 5 meters should be more than adequate.
Underwater photography used to be for those with lots of extra cash hanging around. Thankfully, underwater cameras are more affordable than ever (even moreso than a few years ago), and therefore are much more attainable to the everyday snorkeler. A few cameras I recommend for those just starting out:
- GoPro Hero 4: A wonderful easy-to-use camera that takes fantastic video coverage as well. I love to use it with an extension pole (it even floats so you don’t lose your camera) to get even closer to my subjects (read Tip #2 to see just how important this is). I also LOVE the GoPro for it’s ability to capture a still image from any video – meaning you’ll always have the perfect shot!

- Nikon Coolpix: Super easy to use, and with built in wifi! This was my first underwater camera and it was absolutely perfect to practice on! I was able to get so many awesome shots I was amazed (many found in this post)!
- iPhone with underwater sealed pouch: For those not wanting to spend a pretty penny on underwater photography equipment, this option is perfect! If you’re only planning on snorkeling once or twice, it’s better to have something than nothing!
HOT TIP: Know your equipment and all it’s functions before you get into the water. If you’re fiddling and confused about your camera underwater, you’ll have a difficult time getting that perfect shot. Practice, practice, practice (even in the pool to get comfortable with your equipment)!
Underwater Photography Tips #2. Get underneath and close to your subject
Get as close as you can!
When shooting underwater, it’s best to stay as close as possible to your subject! The farther you are from your main subject (fish, turtles, human subjects), the less amount color the photograph will portray, resulting in a relatively dull image. This is because as light passes through water, color and contrast are lost. Therefore, in order to capture what you’re really seeing, you need to be up close to really show the subjects’ true colors. Remember, never, ever attempt to touch an animal, nor chase it – it’s even illegal to do so in some parts of the world.
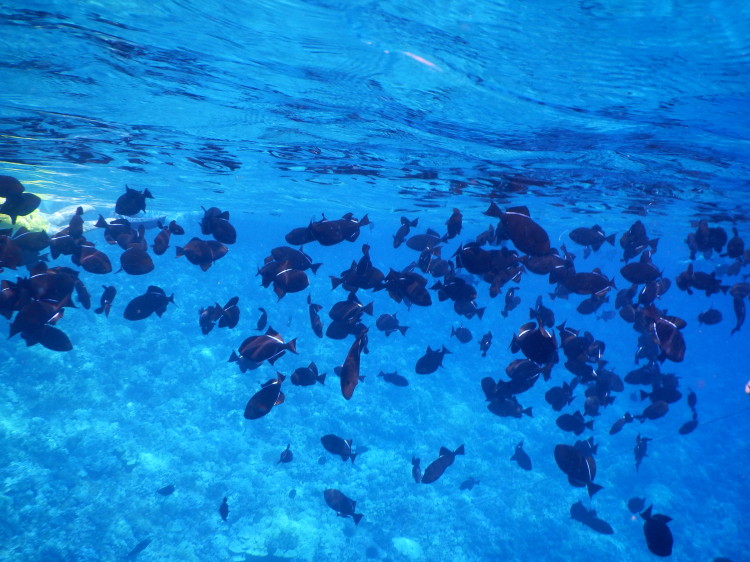
Compare the two photos below: I was able to get a tad closer when taking the second photo. What a drastic difference.


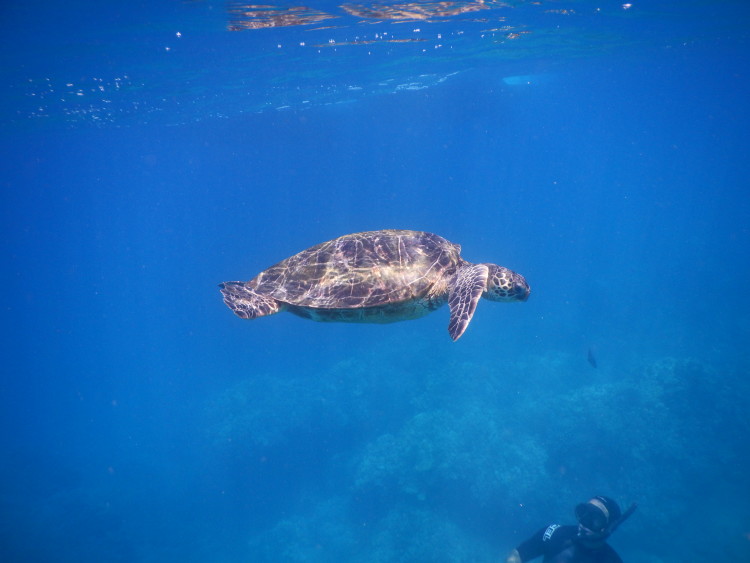
And here’s another example with a Hawaiian sea turtle:


Just goes to show that getting closer will really result in better photos!
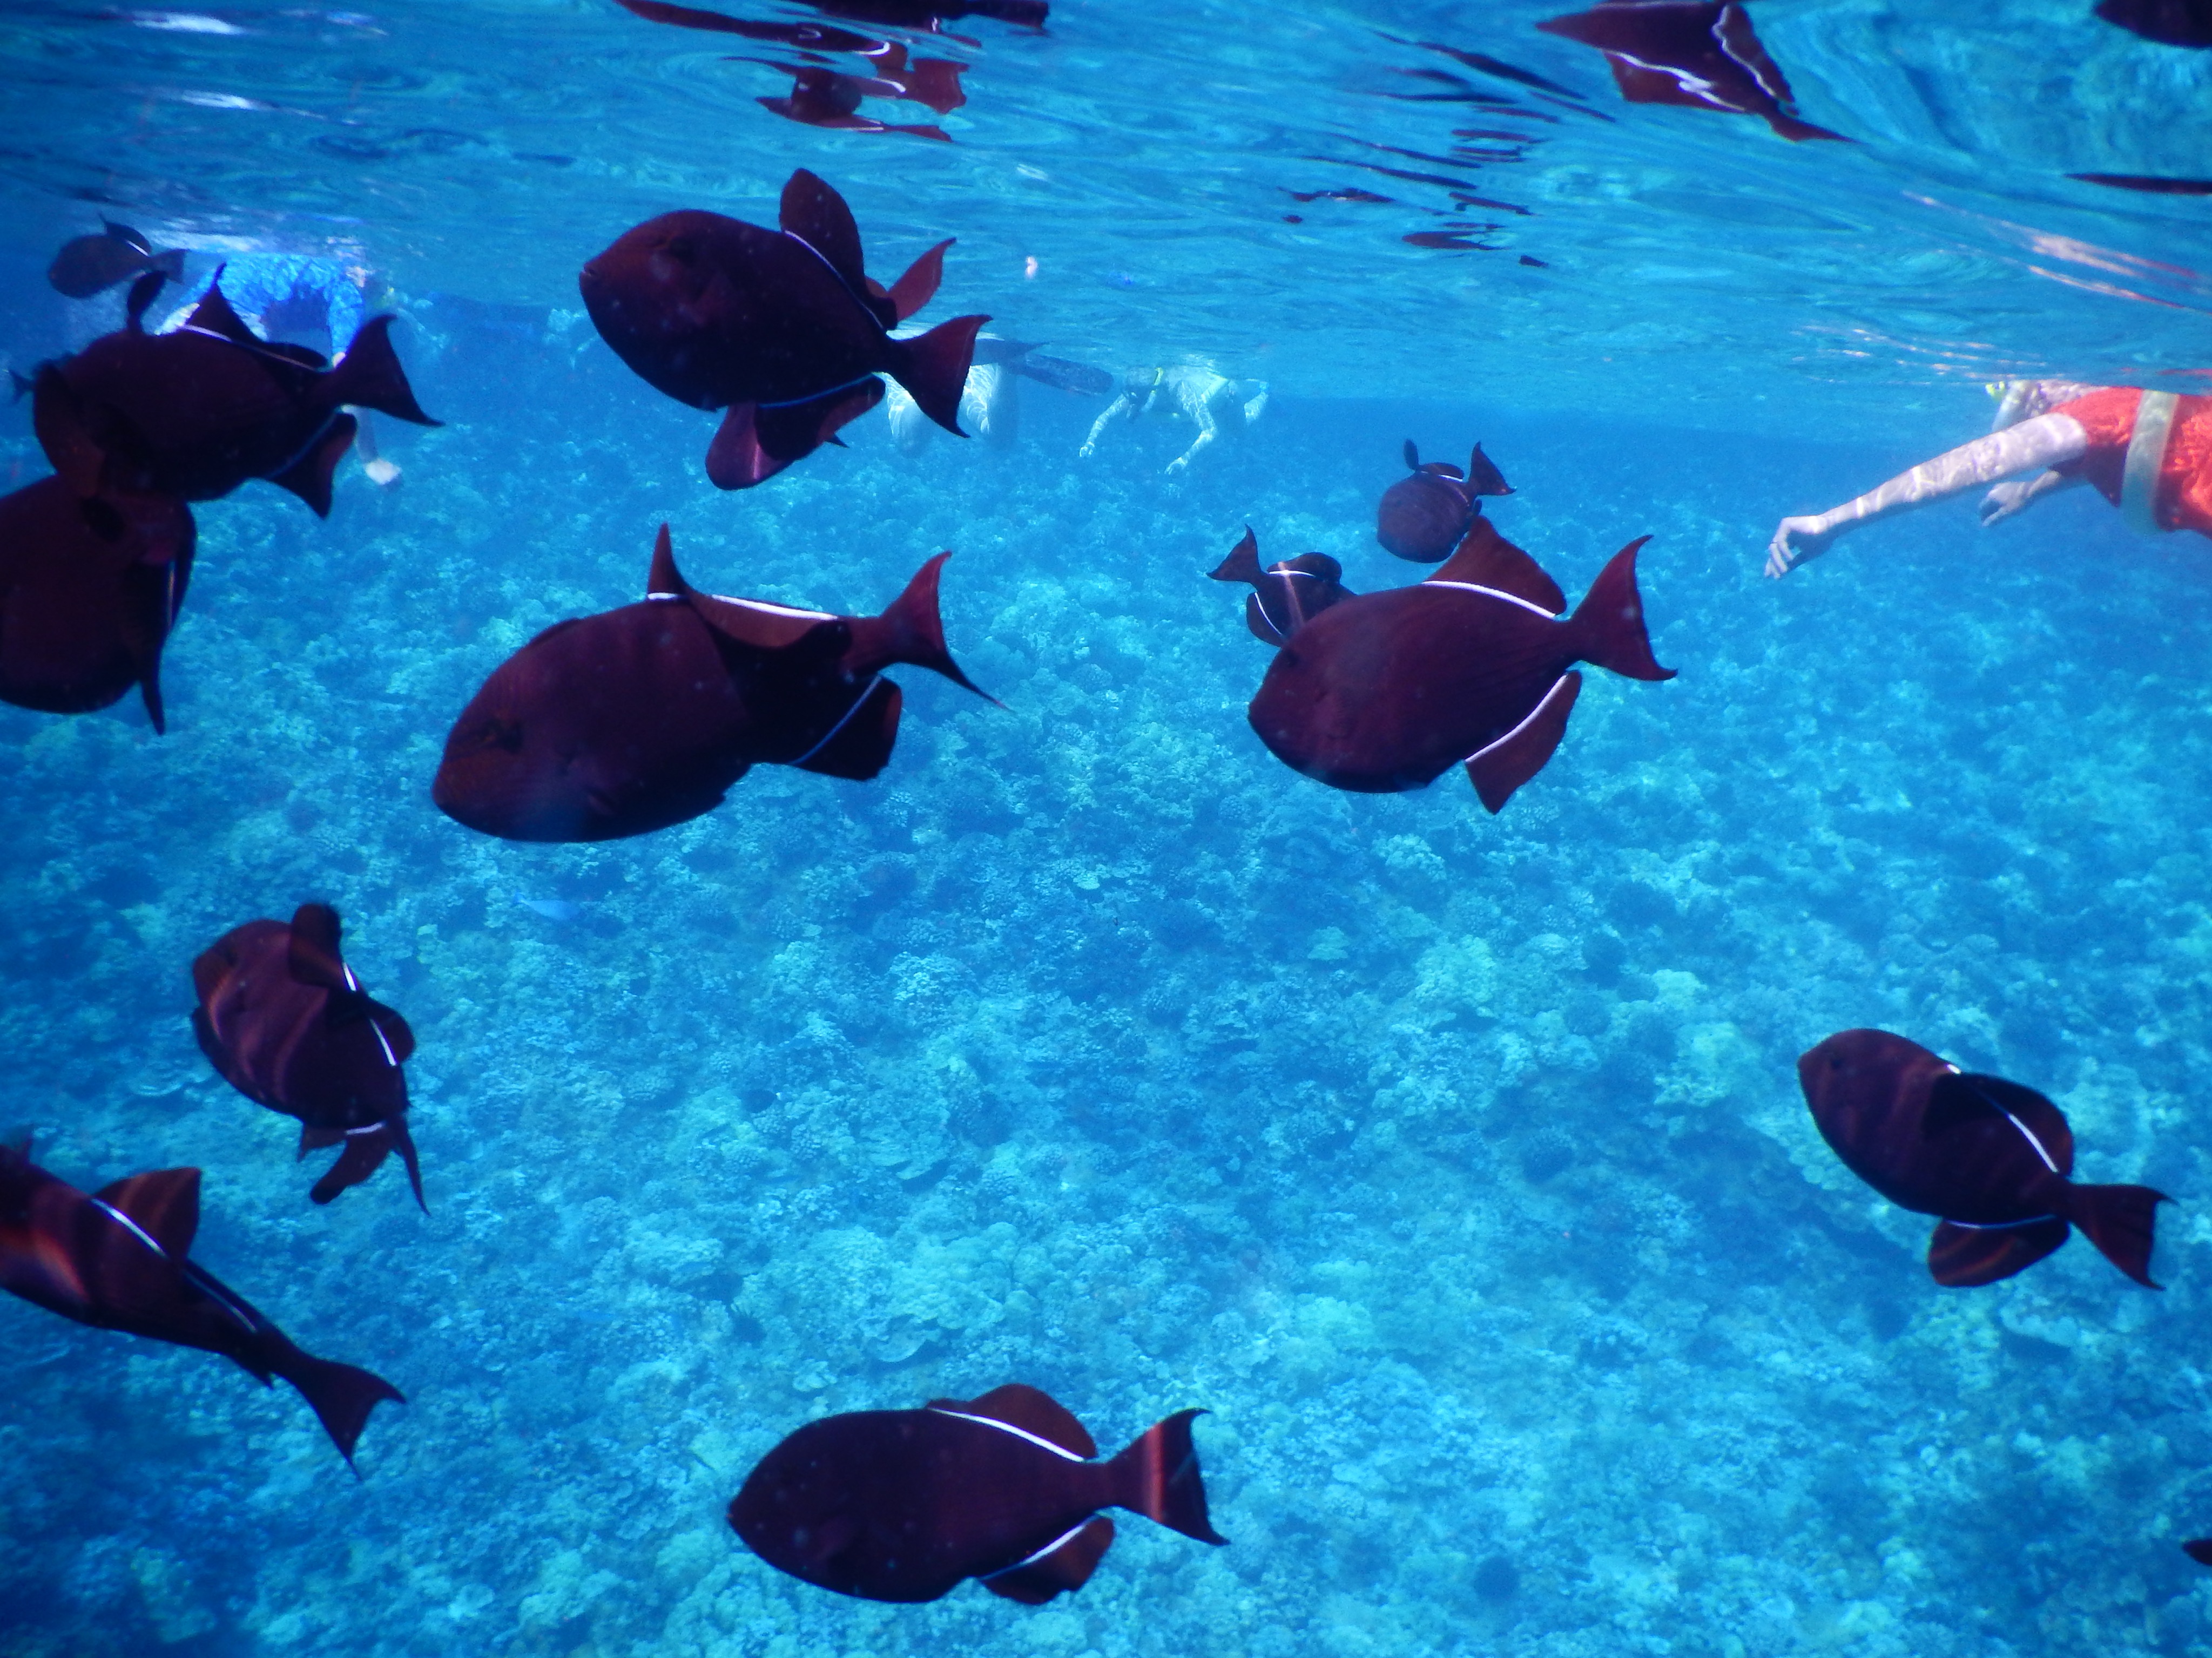
Underwater Photography Tips #3. Pay attention to the background
Get low to the subject so you are shooting up, and not shooting down!
It seems silly but fish and other marine life have good sides/angles, too! Always aim to shoot slightly up so your subjects don’t blend in to the reef or ocean floor. In order to do this, attempt to get underneath your subjects. While this is easier said than done, you’ll see a drastic improvement in your underwater photography. The ability to do some free diving comes in handy here.
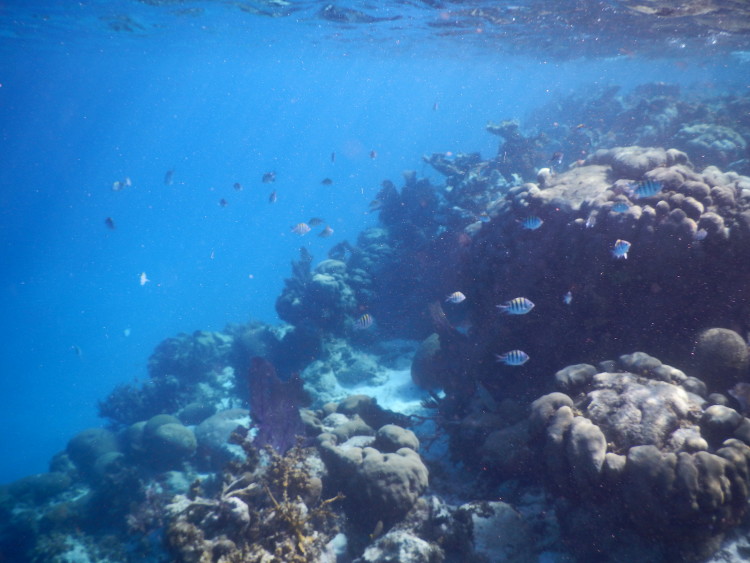
Shooting slightly upwards helps to separate the subject from the background as much as possible. Notice the two photos below:
The first photo was shot directly down into the reef, causing the fish to blend in to the background.
Meanwhile, the second photo was shot slightly upwards, allowing more blue water as well as the surface (and natural sunlight) into the photo. The subject is now the main focus of the photo. This also makes for much more interesting photographs as well.

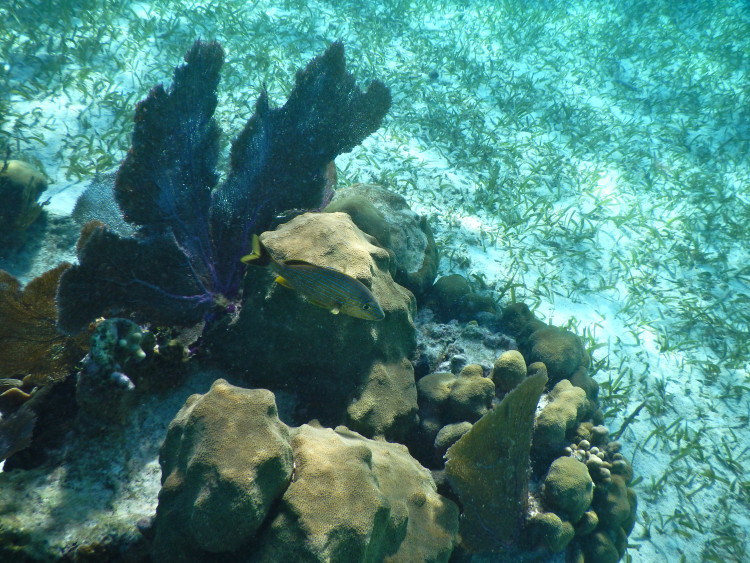
Sometimes you’ll get lucky and your subject will be drastically different than the reef/floor below it, like in the shot below, but don’t count on it.

Underwater Photography Tips #4. Be relaxed underwater
Stay calm and the fish will be calm.
While you can’t control the sea life of course, you are able to control the movements your own body makes. It’s so important to stay as calm as can be while underwater! I can guarantee you that the more you move, the more skittish the fish will be, meaning viewing less fish resulting in more unclear shots. It’s best to move slow, letting your body drift naturally in the water; there’s really no need to kick and/or flap your hands excessively.
That being said, if you’re in a group of people while snorkeling (on a tour especially), attempt to stray away from the group if possible. Of course, you don’t want to venture too far or into unsafe waters, but getting even a few feet away from the masses will dramatically increase your chances of suburb shots.

Underwater Photography Tips #5. Note the direction of the sun
Shoot with the sun behind you!
Shooting with the sun behind you will light up your subject, resulting in brighter colors and overall shots. Remember, if you’re swimming towards the sun, turn around for the best possible color and lighting conditions. The best times to shoot underwater are on bright afternoons when the sunlight travels intensely and aplenty in the water.
Notice the light beams fully illuminating the black tip reef shark below. The fact that it was smack in the afternoon (optimal lighting) and I was pretty darn close to the thing (AHHH) resulted in a pretty fantastic shot.

Hope these quick underwater photography tips were helpful! Let me know if you have any questions down below in the comments! 🙂


Jessica, could you please share the prices of the cameras?